650b Randonneur Conversion Help: #2 – Some Specifics

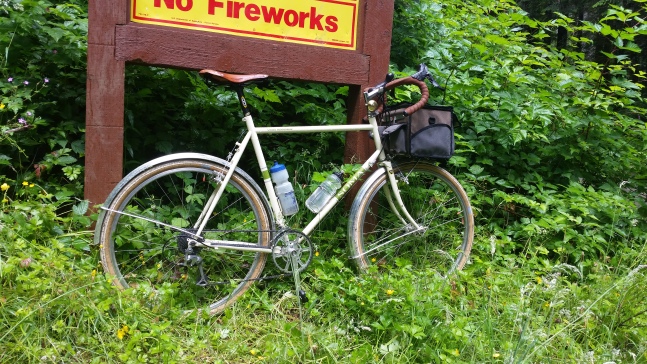
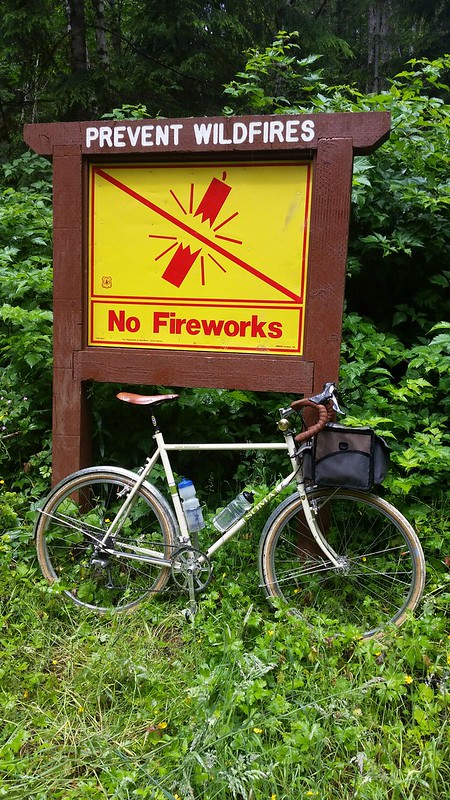
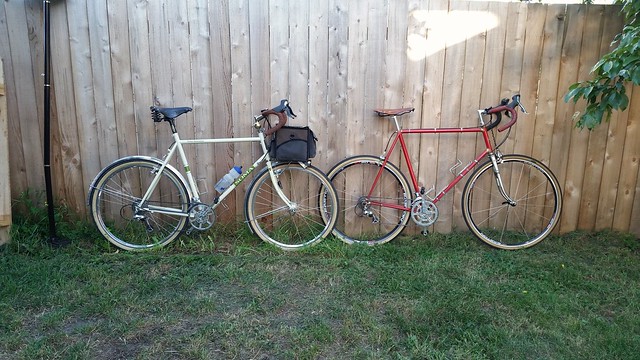
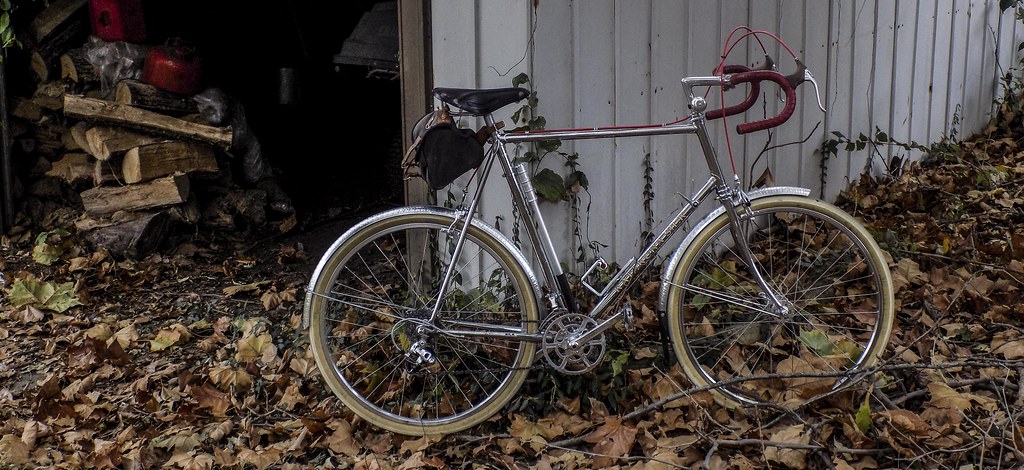
I’ve seen lovely 650b Shoguns (above), MiyatasTreksPeugeotsBianchis – do a Google image search for “your favorite brand” and “650b conversion” and you’ll prolly find a pretty bike or two.  There are many right answers.  All are likely to offer slightly different challenges and advantages based on make, model, age and how hard a life it’s had.

Think about how you want to carry weight.  If your vision is more utilitarian and less randonneur specific, consider bikes with longer chainstays.  A number of older Treks fit the bill.  Chainstays are measured from center of BB to the rear drops.  45cm and up means more stability and less likelihood of heel strike issues.  Shorter chainstays are typically found on sportier bikes, longer on touring and townie bikes.  The Motor Bacon is 425mm +/- 10mm in the horizontal dropouts, a length I’ve been led to understand is common of sporty bikes of the mid to late 70’s.  I have a size 10 foot, I use 175mm crank arms, and when I tried panniers on a rear VO rack, I had intermittent heel strike.  For what it’s worth.

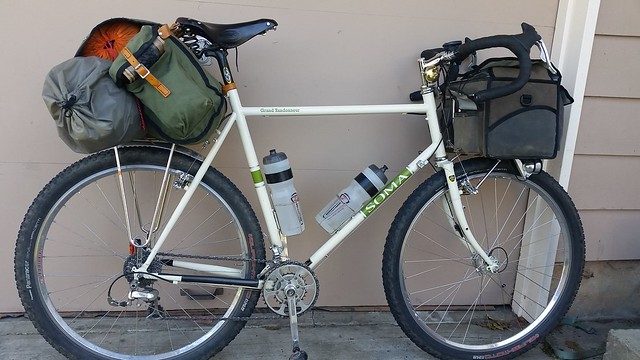
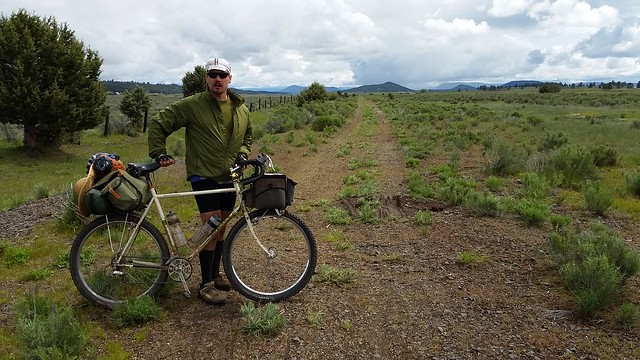
Long stays, a rear rack, some panniers, fenders and nice fat 38mm tires can make an old steel bike a terribly useful thing.  Treks, Miyatas, Fujis and more touring oriented and less fancy bikes work well for this.

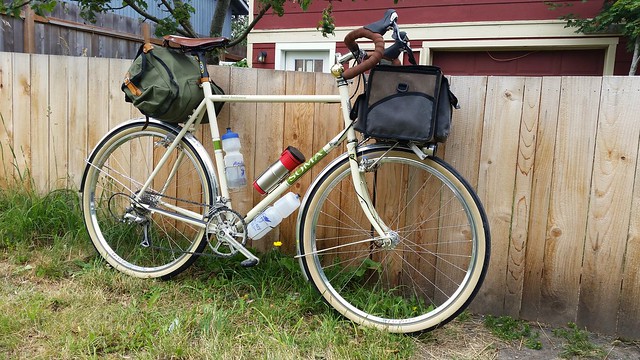
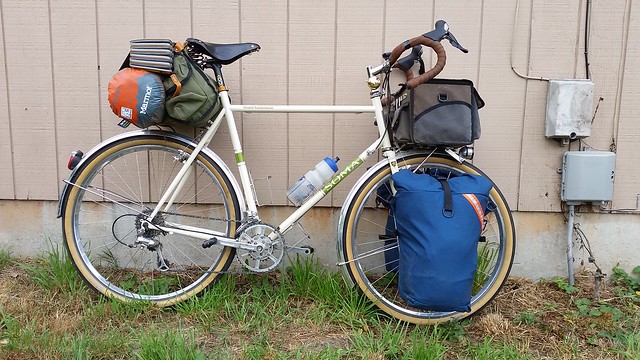
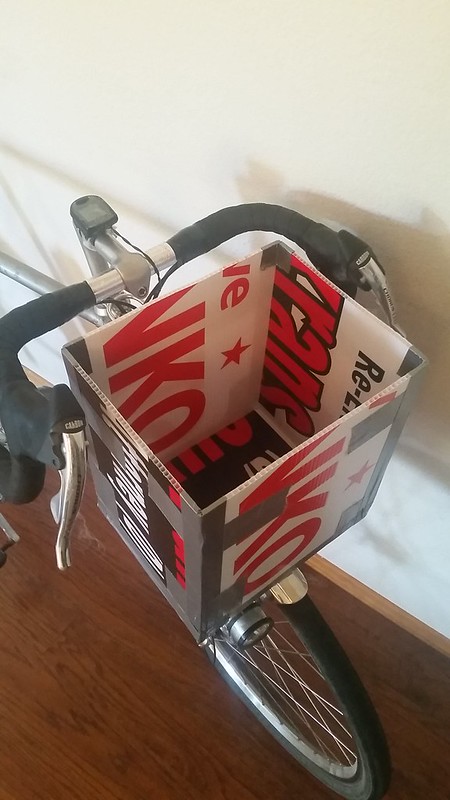
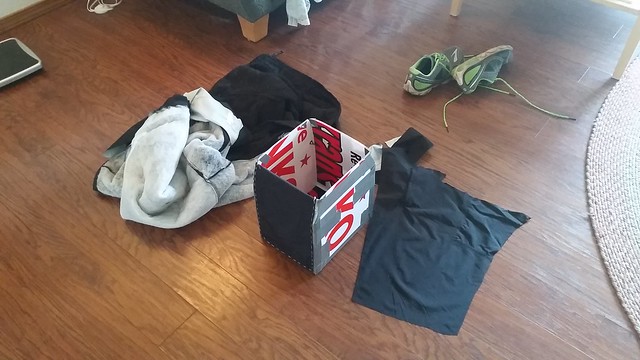
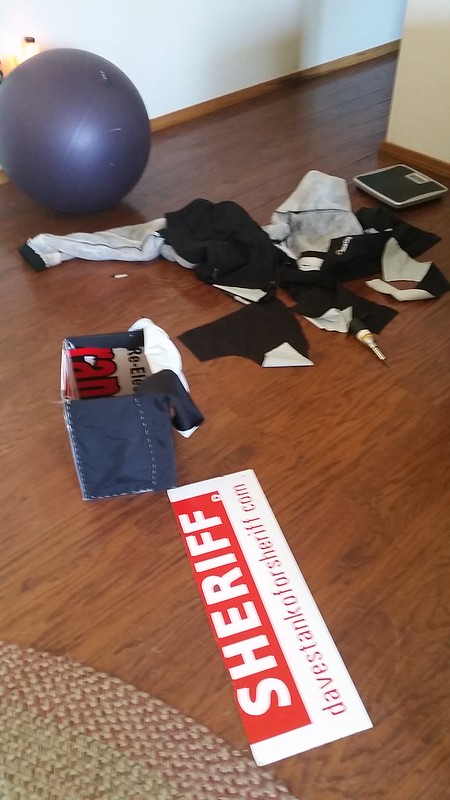
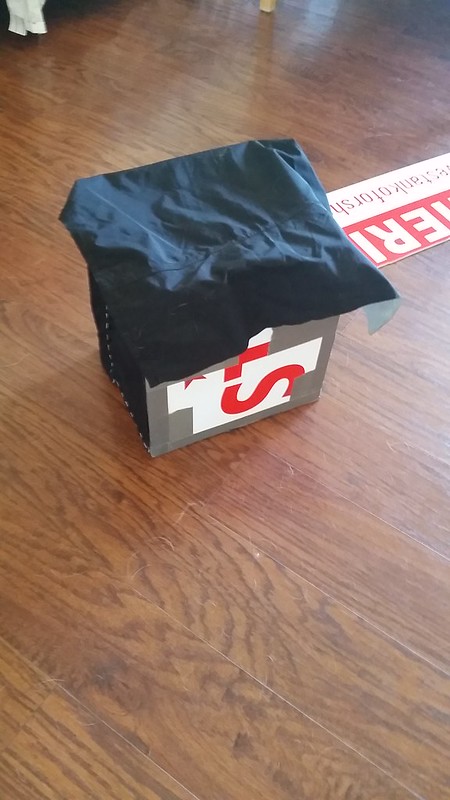
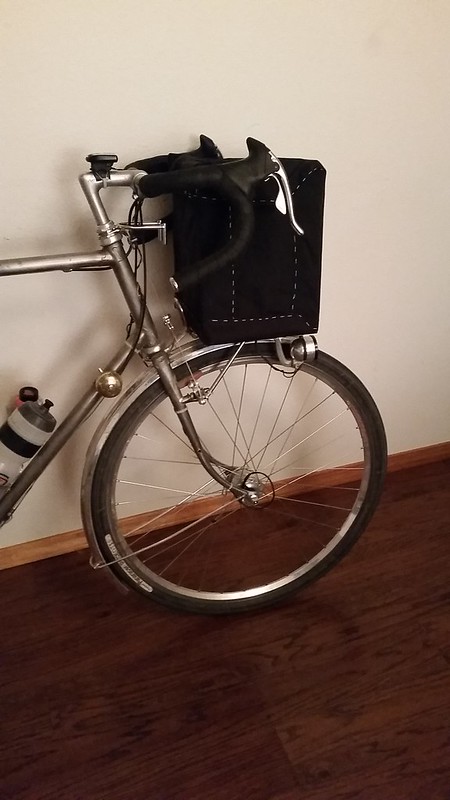
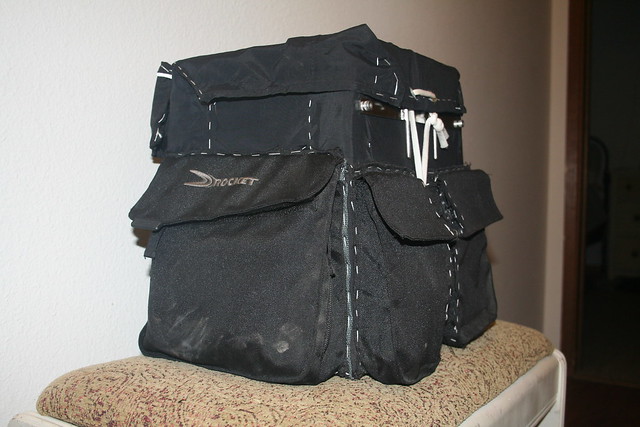
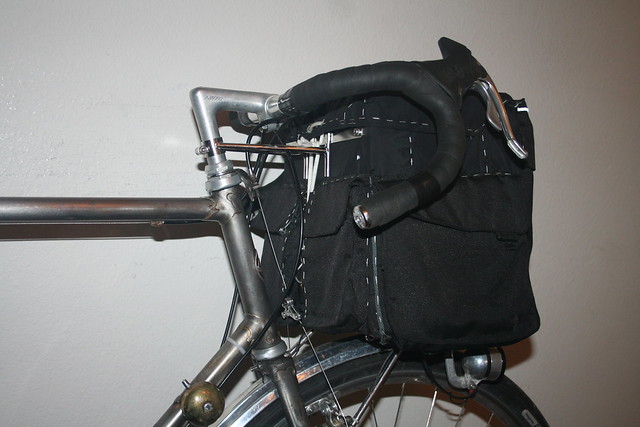
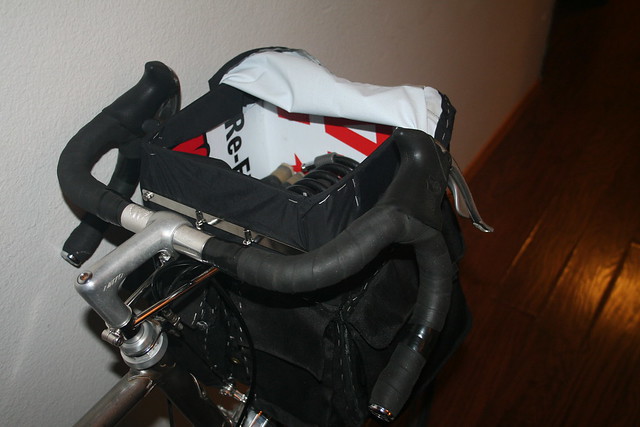
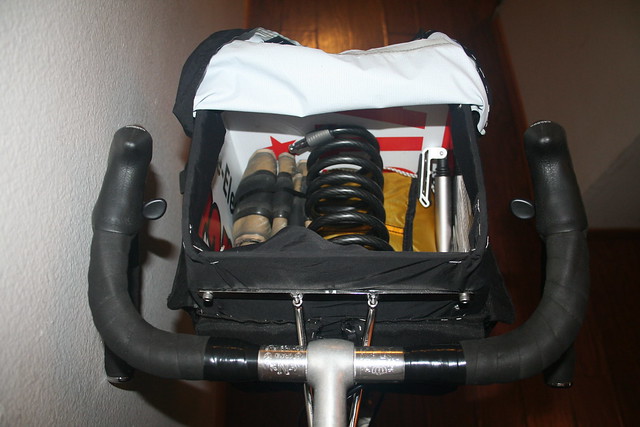
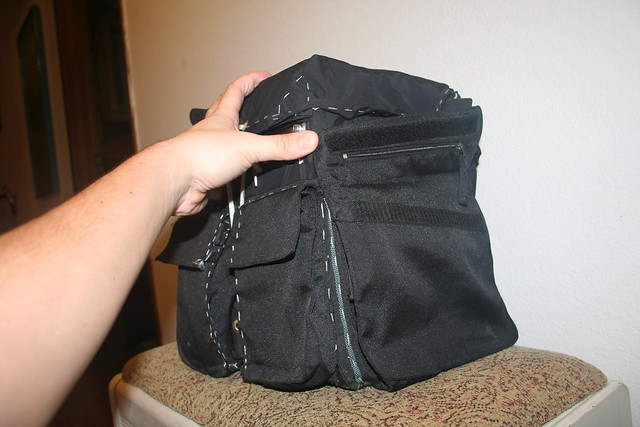
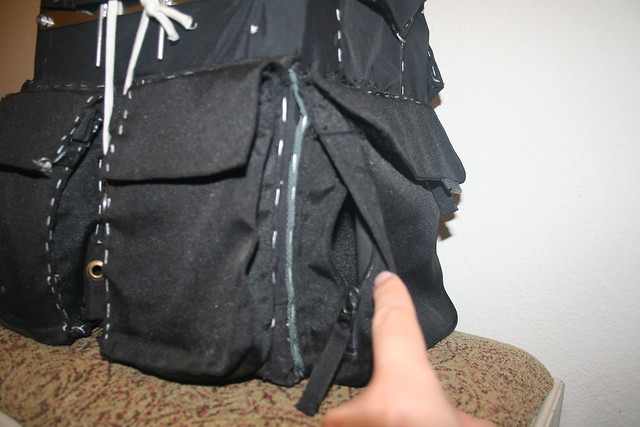
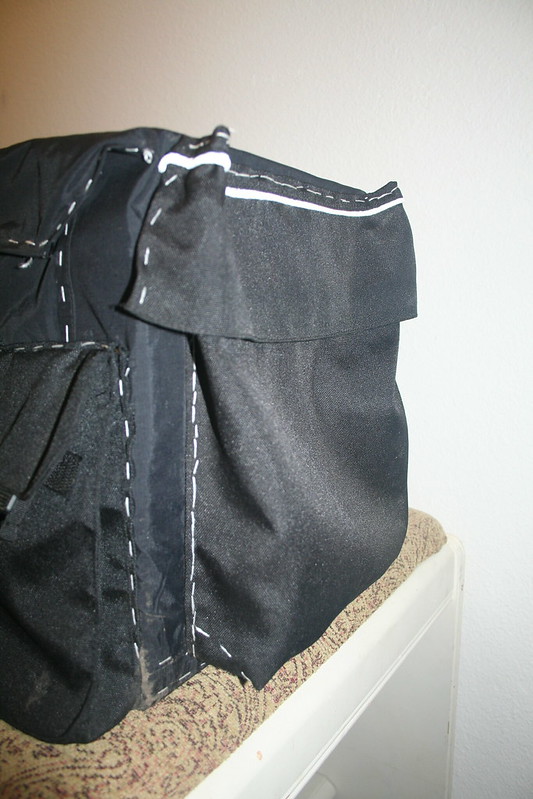
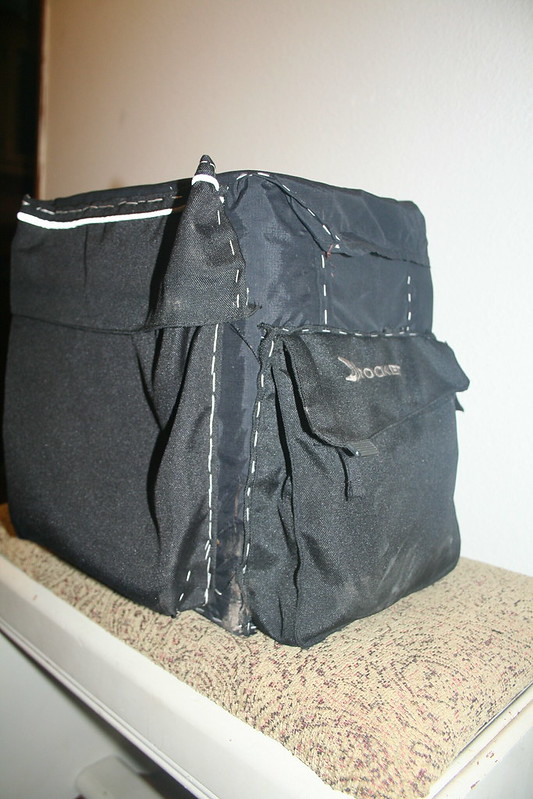
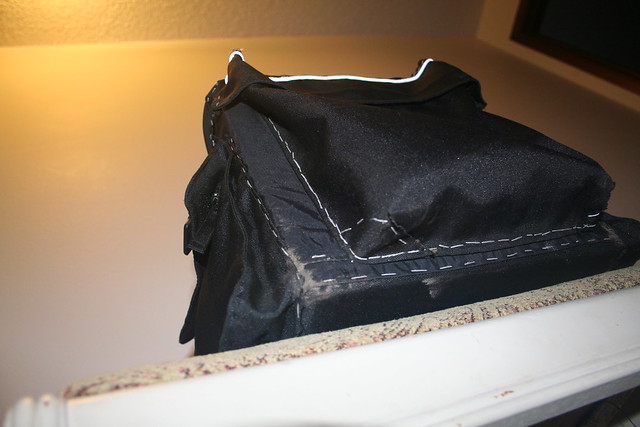
Front loading bikes offer greater risk and reward than going the tried and true rear rack and pannier setup.  Handlebar bags that rest on a small rack snuggled just on top of the front wheel are HOT.  Don’t lie to me, don’t lie to your self.  I don’t care how much electrical tape or how many zipties your decidedly unfoppish thrash monster has, Frenchie Rando bikes and their hallmark boxy bags look purdy.  I rocked kitty litter panniers for a long time, I get it, I do.  But front loading, if you get it right, is dreamy.

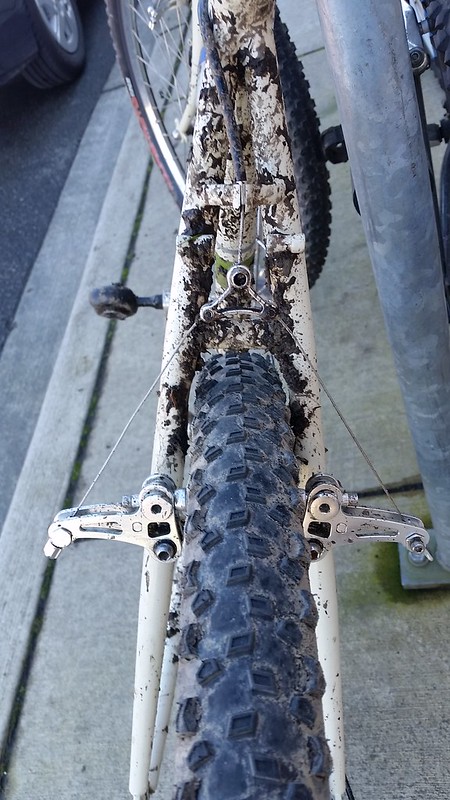
Trail talk!  This trail calculator is extremely helpful.  On the right side of that same page is a diagram showing how trail is calculated along with links to explain possibly unfamiliar terms.

Traditional French randonneurs have “low trail”.  Low here being defined as 45mm or less of trail, generally 25mm-45mm.  Search for Rene Herse or Alex Singer or Jo Routens and you’ll see lots of fork offset towards the bottom of the fork legs.  The old French constructeurs favored low trail.

Low trail feels weird.  Good weird or bad weird, that’s a matter of taste.  Low trail makes the bike feel more stable and helps at low speeds, especially on long, steep, slow climbs.  Low trail also amplifies imput from the riders hands which puts some people off.  The most magical aspect of low trail is it’s ability to make 3lbs on the front of the bike feel the same as 30lbs.  Handling changes little to none.

Low trail is NOT necessary.  Low Trail Is NOT NECESSARY.  Low trail is cool, it’s unique, it has advantages and disadvantages, but it doesn’t have to go hand in hand with 650b.

Mid trail is generally defined as 45mm – 60mm and high is 60mm and up.  My Bridgestone MB-1 mountain bike has a trail number in the mid 60s and it works fine with a boxy bag, even out on the trails.  Older bikes, 70’s and earlier, often have mid to high trail.  Newer bikes, unless randonneur-ish, have high trail.  Generally.

With a high trail bike, more weight on the front end tends to make steering heavy, unlike with low trail.  It’s not horrible, its not a deal breaker, but it should be considered when planning a build.  Consider perhaps a smaller front bag and a trunk bag or rear panniers when hauling.  If you use a messenger bag or typically don’t lug a lot of weight around, problem solved.

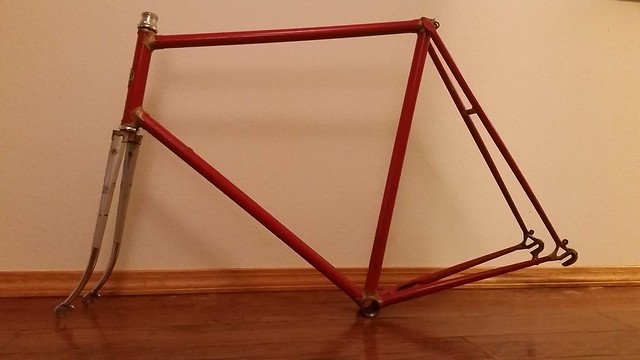
Mid trail – who knows man :).  Try it!  Fork offset back in the 1970s and earlier tended to be greater but not so great as to be like the old French constructeurs.  Some, like my Motobecane, had steepish headtube angles (74°) along with a decent bit of offset, making for trail numbers in the mid 40s.  This works fine for some people, but if you want low(er) trail and don’t want to pony up for a custom bike or custom fork, look for steep head tube angles and more offset and someone willing (if you’re not) to rerake your fork.

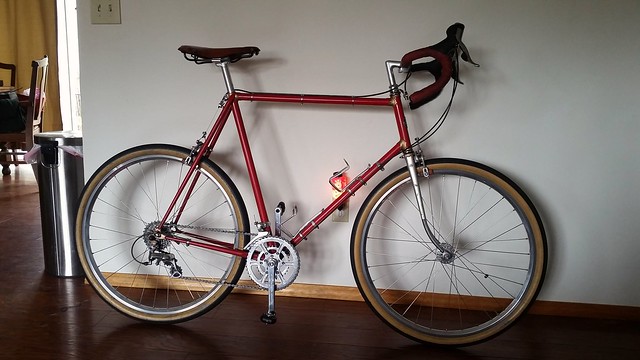
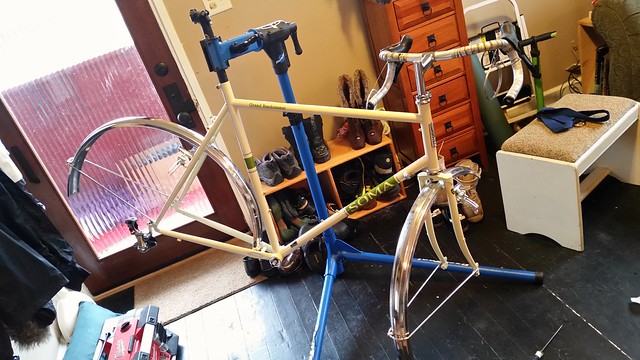
Here is a fork reraking resource.  Here is another.  Be sure to read this and know that reraking also impacts headtube angle!!  Thank you Mark Guglielmana for the great write up and lovely decaleur on my bike.  Go easy, little tweeks.  If you go too far, you run out of room at the fork crown and you also run the risk of a silly looking downward-sloping top tube.  I’d say no more than ~5mm of increased offset, especially when you consider how the offset PLUS increased headtube angle can lower trail quick.  But this can all help to just tweek the trail number enough to make a front load that much better and put a mid trail bike squarely into low trail territory.

I think I’ve got one last 650b conversion blog in mind at this point and that’ll be for folks who want to do some more frame modifications.  Also, ask questions, comment, let me know what I’m missing and I’ll try to help.

650b Randonneur Conversion Help: #1 – Some Basics

** Updated November 26th 2015 **

Why convert to 650b?

  • There are loads of bikes out there that make good conversion candidates, but why bother?  Few reasons.  Mainly for comfort.  A 700c wheel measures 622mm in diameter.  A 650b wheel measures 584mm.  Interestingly, a 700c wheel with a 23mm tire has the same total circumference as a 650b wheel with a 42mm tire.  So, if you trade some wheel for some rubber, you can nearly triple the total air volume your bike rides on.  Your butt and hands will thank you.
  • The tradeoff is rotational weight (larger tires weigh more) for comfort.  In my experience and the experience of many others, this tradeoff is minimal in terms of speed, especially if you like big rides.  If you’re out there for a few hours, comfort makes you go fast.  If your ass and hands are numb after 3 or 4 hours, it’s hard to really give it the gusto on the way home.

Quick Resources

20150615_135850

Randonneur?

  • There is an awful lot out there already.  My purpose is to add some newer experiences and information focused specifically on randonneur inspired 650b conversions of purdy vintage bikes.
  • Randonneur is French for “hiking”.  So, hiking bikes.  I guess.  Nomenclature be damned!  More specifically, my goal here is to help interested people build cheap and sturdy fop machines inspired by the design, layout and geometry of classic French randonneurs.  I think that’s my angle. Everything Weigle and Mitch and others do is SHOCKINGLY beautiful.  But I can’t afford that bidness.  I’m a recently unemployed para-educator.  So, yea.  $16,000 for a bike is beyond me.  But if you look past the fop factor and sticker shock, rando style bikes make an awful lot of practical sense, especially if you’re questing for the holiest of holiest, the grandest of Pegasus, the pointiest of unicorns – The One Bike. One bike to rule them all!  A bike for touring, a bike for camping, a bike for groceries and around town, a bike that’s comfortable, a bike that is fast, a bike for the summer and winter and rain and sun, a bike that is home on all sorts of road surfaces, a bike that you can lock up for a while without skin-crawling terror.  I think rando-esque bikes, as a general ballpark or angle to come from, achieve this better than any other options I’ve seen.

2015-11-07_01-32-14

Start with a good frame.

  • You can build a utilitarian heart-breaker with a cheap to free frame.  Start with good steel.  Look for stickers on seat tubes and towards the tops of fork legs – Reynolds 531, Tange Champion #1 or #2 or Prestige, Columbus SL, Vitus or Ishiwata or other high quality “double butted” or “DB” tubing.  Doubled butted 4130, Cro-mo, these are typically good things to see.
  • Do Google searches for “[manufacturer’s name] catalog”.  There are loads of old catalogs from Motobecane, Peugeot, Gitane, Raleigh, Nishiki, Miyata and others online.  Stick with bikes from towards the tops of those catalogs – the nice ones.  Catalogs and general image searches can help you figure out what catches your eye, what YOU might like to build, based on aesthetics and your desires for the finished bike.
  • Nice steel isn’t generally valued much today, so very nice frames go for cheap on Craigslist, Ebay and elsewhere.  The top bikes from big manufacturers can still fetch a hefty price, Schwinn Paramounts for instance, but drop a few rungs down the catalog and you can find bikes like my Motobecane Grand Jubile for $100 online or prolly less at yardsales and the like.

1975 Motobecane Le Champion

Frame clearances

  • So yea, start with a good frame.  Next, clearances.  Bikeman goes into this extensively. I can’t add much.  If at all possible, have a 650b wheelset with the tires you’d like to use with you when you look at bikes.  If clearances are real tight at the chainstays, check the chainstays’ shape.  Are they already heavily dimpled?  If not, you might be able to make some room with channel locks and a nut.  Also, 38mm tires rule.  42mm tires are cool too, but if they’re just too close for comfort, my absolute favorite tire these days is the 38mm Pacenti Pari-Moto.  Going from 42mm to 38mm is, in my mind, a very minimal compromise if the rest of the bike is looking ideal for 650b.  As mentioned by bikeman, check the BB drop.  Pedal strike can be scary.

2015-11-07_01-32-05

French bikes are awesome and weird

  • Some things to consider if you go old French (Peugeot, Motobecane, Gitane, others).  You’ll have a French thread headset.  Not too much trouble, Velo Orange sells them if you’re in need and old ones are out there.  If you want a modern 8-10 speed drivetrain, the rear dropout will need to be widened from 126mm to 130mm which isn’t much trouble.   This goes for non-French bikes of the era as well.  Stems and bottom brackets can be the real trouble with old and French.  French stems were 22.0, as opposed to just about everyone else, who used 22.2 stems.  This 1/5th of a millimeter can BITE YOU!  Or not.  Before de-Frenching my Motobecane (maybe a later blog post on that), I used 22.2 stems.  Some would work, some wouldn’t.  A little (or more) sanding should work to make a 22.2 stem fit.  And 22.0 stems can be found.
  • Bottom brackets can be trickier.  Many old Frenchies have French thread bottom brackets.  These, again, are still made by VO and others.  However, Motobecanes and perhaps others had Swiss thread BBs.  These may still be made by Phil Wood for a not cheap price but have otherwise gone the way of the dodo.  Check with the LBS (local bike shop if you’re not hip) to see if they can re-tap your BB shell to take an English thread (standard today) bottom bracket.
  • As always, Grandpa Brown has LOADS of helpful things to say about Frenchies.  And if you find a complete French bike in good shape, you may well not need to worry about stems or BBs or headsets or anything for a good long time.

2015-11-07_01-28-47

Brakes!

  • If you want to go 650b, one thing that absolutely needs to be replaced are the brakes*.  This too is well covered by Bikeman iirc (if I recall correctly), but the main options are the Tektro 559 and Dia Compe 750.  If you’re going from 27″ to 650b, go Dia Compe.  They have 5mm more reach and still you may have to remove some metal from the rear pad adjustment slot – Dremel or similar helps.  I used a round file – works but takes longer.  Both these options have long brake arms which can flex and make braking underwhelming.  Pads can make a huge difference.  The Tektro 559 will take a Kool Stop Dura-2 replacement insert, which has done wonders for any brake I’ve plugged them into.  New Dia Compe 750s look like they come with a pad holder that takes a typical Shimano style pad that can be replaced with a Kool Stop like the Tektro can, but if you find some cheap old 750s (shops with lots of old parts will often have used 750s for $5-$10) that have old or no pads, something like this with Kool Stops will help.
  • Other brake options include Tektro 800a (LOTS of reach for cheao) and MAFAC Raids (LOTS of reach for not cheap and rare – but MAFAC!)

* Unless you’ve converting a disk brake bike – not a thing on old bikes.  Otherwise, at least VERY likely you’d need to swap brakes.

2015-11-07_01-30-28

All this can hopefully help you towards building a slick little bike.  This is pretty basic stuff thus far tho.  New wheels, new brakes, nothing too tough.  I’ll go further in depth with later posts.

Soma Grand Randonneur

2015-11-07_01-23-18

The first bike I rode the crap out of was a Rocky Mountain 700c commuter hybrid thingy.  It had fenders and a rack and kitty litter panniers that my laptop and school stuff and camping gear could fit into – it was great.  There are loads of flat, endless paths and roads around Olympia that I’d cruise for hours at a clip on.  Comfy and useful and a great escape from life stuff.

2015-11-07_12-18-30

The first bike I loved was my father’s hand me down Motobecane Grand Jubile.  A school teacher and later a hipster who I rode from Olympia to Portland with put the bug in my ear about “Randonneur” bikes.  I’d given a friend of mine in college this old Motobecane to paint and build up but it never happened.  Eventually, this same friend took a traveling nursing gig in Portland and, bringing the bike with him, moved in to the house I’d just bought in Portland.  The picture above is the oldest picture of it I have but it went thru a number of rando-ish iterations before it ever looked as nice as it does in that picture.

2015-11-07_01-04-22

I had a hard time getting comfy on the bike.  I had an extended super plushy saddle w/ shock post phase.  I eventually bought a Brooks Flyer, which helped a bunch, but riding a Cannondale CAAD 4 for a while taught me two crucial things; (1) skinny tires guzzle monkey balls* and (2) going fast is really fun.

* This is a statement of opinion, not fact.

2015-11-07_01-05-12

The Motobecane, at one point, could fit 700c x 32mm tires front and rear with fenders.  Then it couldn’t.  Today, I prolly could’ve figured this out.  Back in the day, I couldn’t, and riding with a 28mm up front (it was a daruma bolt clearance issue if I recall correctly*) and a 32mm in the rear was making me grumpy.  Bigger, longer rides still hurt my bum bum.  And the Motobecane didn’t seem like the right bike for what I wanted to do**.

* Did you know that’s what iirc stands for?  Nobody told me that shit and I couldn’t figure it out forever!

** Back in the day me was incorrect

2015-11-07_01-07-01

I ended up selling the house in Portland and moving to Port Townsend when my girlfriend (now wife) got a job at a pediatric clinic.  With some of the house sale money, I bought a Soma Grand Randonneur.

2015-11-07_01-07-40

This looked like the thing.  It was 650b (which I thought I wanted), it could fit 42mm tires and fenders (which I HELLA thought I wanted), it was low trail (which I thought I wanted) and it wasn’t $1500 or more dollars for the frame and fork – which was over the budget I’d set for the whole bike, using a mix of new and used parts.

2015-11-07_01-08-05

Homie at the local bike shop, who I bought the bike thru and who built the wheels, let me borrow his 650b wheelset until my ultra sexy SONdelux/Ultegra & A23 wheels were built.  Once the bike was done, I was thrilled.  I dug the low trail, the fat cushy tires, the 105 10 speed brifters with the cable routing thru the bar wrap and not in the way of the wildly expensive and uber sexy Swift Ozette bag.

It was a really sweet bike.

2015-11-07_01-23-07

I got her adventure ready!

2015-11-07_01-23-18

We went on adventures!  And I got pissed off!  And had chains break for no good reason!

2015-11-07_01-24-13

We went on MORE adventures!  With 42mm knobby Soma Cazadero tires into Olympic National Park and back thru Bon Jon Pass.

2015-11-07_01-27-45

And up to San Juan Island for a night with my wife, where she had her final break up with her Peugeot PX-10, picking up the bike and throwing it into the woods for very understandable reasons.

Likely going back to the Longflap for the Oregon Outback.

After some measurements, some chin scratching and purchasing some tires, I made a discovery.  The Soma Grand Randonneur has a secret.

I'm not saying it's smart

If you get a little sassy with some channel locks and a big bolt (ideally wrapped in electrical tape in order to go easier on the paint), the Soma Grand Randonneur becomes a baller ass bikepacking/drop bar mtn bike!

Some dummy.

NOTE: This only works with the 1st generation Soma GR.  The fork crown on the 1st gen is 60mm wide on the inside, so a 2″ tire, like the Quasi Motos in the picture or, better, Thunder Burts (really great tire) fit just fine.  The 2nd gen Grand Randonneur is closer to 50mm on the inside.

The rear triangle on the 1st gen Grand Randonneur very nearly fits the 2″ tire but, for me, it took maybe 2-3mm worth of dimpling, primarily on the seat stays, maybe a touch on the chain stays, to get the tire to spin freely and have room in case the rear rim got a little out of true.

2015-11-07_01-25-35

Throughout our love affair, the Soma and I, there was still the Motor Bacon, the lovely 1976 Motobecane Grand Jubile, the family heirloom, the vintage French sex pirate, shod with super fancy 700c wheels but otherwise outfit with the best of what was left over from the Soma build – sitting there.  Looking good.  Rarely getting ridden.  But between the intertubes and suggestions from the local bike shop, I purchased a set of old Dia Compe long reach centerpulls…

2015-11-07_01-29-38

and immediately had a problem.  The Soma is stiff.  It’s like a dead fish.  The frame puts everything where it should be, has loads of room, loads of braze-ons, easy to configure and build up – but she’s dead!  ZOMBIE BIKE!  Loaded up for the Oregon Outback and shod with 560g knobby tires under 20psi front and rear and she’d get a little zombie bottom bracket booty-shaking, but certainly not that mystical sensation of “planing”*.  Lady Miss Bacon Booty, however, is a lively, writhing go fast monster, and after my suspicions of how much quicker the 650b Motobecane was than the Soma were confirmed by Strava – my relationship with the Grand Randonneur began to deteriorate.

20140917_094546

Especially when you consider the price, the Soma Grand Randonneur is a phenomenal bike.  When fully kitted out with travel gear, the bike wakes up a bit and begins to work with you.  And, factoring in the low trail and room for nice big plush tires, it makes a great deal more sense to me than a Surly or other straight gauge tank.  The one drawback here being the short chainstays, making heel strike with rear panniers a problem.  But if you pack it up similar to how I have it laid out above, you have capacity for damn near everything.  If memory serves, I only ever put all that on the bike once, and that was so I could carry everything for my wife and myself for a camping trip (ie – to keep as much weight off her bike as possible). I pack light, but I think what I’m saying is, even if you want to carry the kitchen sink, the Grand Randonneur is a good bike for it.

Quick brevets?  Well, quick anything, I’d look for a different bike.  But for a townie, or hauling or touring or even bikepacking, this is a great bike.

Last shot of the bike at the Deschutes.  Got beer for folks at the Biggs Junction truck stop.

Oregon Outback photos

3 Day Spring Break ONP tour

More Grand Randonneur photos

Rocket Box Handlebar Bag

20151103_123849

It’s a randonneur style Frenchie boxy bag made out of old yard signs and a Joe Rocket Ballistic motorcycle suit (hence “Rocket Box”).  I own a VO Campagne and a big Swift Ozette, so I had some idea what I liked and didn’t like in boxy bags before I started.

20151103_123859

Considering the fact that it’s made entirely using borrowed coroplast, dental floss, more than lightly used ballistic nylon, hook and string and assembled by needle, pins and channel locks to help push and pull the needle thru the folded nylon and coroplast, this thing is diggity DOPE!

20150811_144105

Measuring the bike, the space and shape between the drops, measuring from the bar flats to the top of the rack and knowing I wanted to shorten the depth of the bag an inch from the Ozette so it didn’t overhang the front of the rack, I began.  Recklessly.  Passionately.  Day-drinkingly.  Summer-offishly.  It was super fun.

20150811_144120

Coroplast is waterproof, as is duct tape, so building the main box out of 5 pieces of plastic cardboard was a simple and obvious choice for making the basic waterproof shape of the “bag”.  I’ve seen pictures of a plain coroplast box used on a front rack for months or maybe years without issue*, so I was tempted to stop here and see how it worked.

*If I’m describing something you made, please comment 🙂

20150812_173240

The temptation passed.

20150813_130320

I wanted sexier.  Frenchier.

20150813_130350

More radderer.

20150814_212411

The finished bag has been super useful.  All 5 pockets on the bag came from pockets on the original motorcycle jacket and are HUGE.  The side pockets are double pockets accessible from the top and rear (see pictures below).  The front pocket is what was the rear vent flap and even has a reflective strip across the top!  The rear or rider facing pockets were cut and folded together from the long strip pocket along the bottom booty of the jacket.

20150825_123259

Total cost was $3 for floss, tho I found out too late we had leftover stuff my wife doesn’t like ’cause its too waxy.  So it could’ve been free dollars.  November 2nd just came and past, so I’ll bet yard signs are plentiful in most places.  Goodwill or similar for a motorcycle jacket.  Duct tape?  Needle and some pins?  Not using a pattern, pinning schtuff to the box and sewing right into the box was essential, but what I’m getting at is – do it.  If you’re reading this and have any interest, you could pull this together.  Give it a go!

IMG_1948

Swift, Gilles Berthoud, RuthWorks (fo real real, check RuthWorks for the crazy beauty and goodness) and others make some sweet stuff, but if you’ve more time than money or are just feeling crafting on the couch in the evenings… yea.  Dimensions on this particular bag are 11.5″ H x 10.5″ W x 8.5″ D.  The bag tapers slightly towards the top to make a bit more room for hands on the bars, so the top opening is 9″ W x 8″ D.  Customizing the bag to fit your application and bike dimensions is prolly the best part of a DIY bag like this.  I think.

IMG_1944 IMG_1945 IMG_1946 IMG_1949 IMG_1950 IMG_1951  IMG_1952 IMG_1953 IMG_1954

Even more pictures here