
** Updated November 26th 2015 **
Why convert to 650b?
- There are loads of bikes out there that make good conversion candidates, but why bother? Few reasons. Mainly for comfort. A 700c wheel measures 622mm in diameter. A 650b wheel measures 584mm. Interestingly, a 700c wheel with a 23mm tire has the same total circumference as a 650b wheel with a 42mm tire. So, if you trade some wheel for some rubber, you can nearly triple the total air volume your bike rides on. Your butt and hands will thank you.
- The tradeoff is rotational weight (larger tires weigh more) for comfort. In my experience and the experience of many others, this tradeoff is minimal in terms of speed, especially if you like big rides. If you’re out there for a few hours, comfort makes you go fast. If your ass and hands are numb after 3 or 4 hours, it’s hard to really give it the gusto on the way home.
Quick Resources
- Sheldon Brown (650b link) has loads of useful things to say on the subject, as does Rivendell (700c to 650b link), and Bikeman (HUGE 650b link) has an exhaustive and indispensable blog post and general 650b blog that’s useful and interesting. I highly suggest starting there, even tho it’s a touch dated. The Google 650b board is a great resource as well and is full of people that will help you! Search the board before asking questions – it’s prolly been asked before.

Randonneur?
- There is an awful lot out there already. My purpose is to add some newer experiences and information focused specifically on randonneur inspired 650b conversions of purdy vintage bikes.
- Randonneur is French for “hiking”. So, hiking bikes. I guess. Nomenclature be damned! More specifically, my goal here is to help interested people build cheap and sturdy fop machines inspired by the design, layout and geometry of classic French randonneurs. I think that’s my angle. Everything Weigle and Mitch and others do is SHOCKINGLY beautiful. But I can’t afford that bidness. I’m a recently unemployed para-educator. So, yea. $16,000 for a bike is beyond me. But if you look past the fop factor and sticker shock, rando style bikes make an awful lot of practical sense, especially if you’re questing for the holiest of holiest, the grandest of Pegasus, the pointiest of unicorns – The One Bike. One bike to rule them all! A bike for touring, a bike for camping, a bike for groceries and around town, a bike that’s comfortable, a bike that is fast, a bike for the summer and winter and rain and sun, a bike that is home on all sorts of road surfaces, a bike that you can lock up for a while without skin-crawling terror. I think rando-esque bikes, as a general ballpark or angle to come from, achieve this better than any other options I’ve seen.
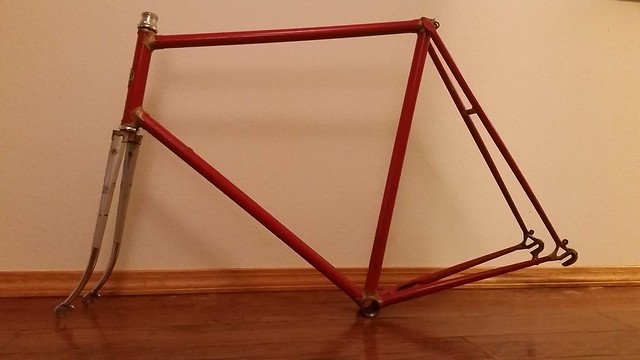
Start with a good frame.
- You can build a utilitarian heart-breaker with a cheap to free frame. Start with good steel. Look for stickers on seat tubes and towards the tops of fork legs – Reynolds 531, Tange Champion #1 or #2 or Prestige, Columbus SL, Vitus or Ishiwata or other high quality “double butted” or “DB” tubing. Doubled butted 4130, Cro-mo, these are typically good things to see.
- Do Google searches for “[manufacturer’s name] catalog”. There are loads of old catalogs from Motobecane, Peugeot, Gitane, Raleigh, Nishiki, Miyata and others online. Stick with bikes from towards the tops of those catalogs – the nice ones. Catalogs and general image searches can help you figure out what catches your eye, what YOU might like to build, based on aesthetics and your desires for the finished bike.
- Nice steel isn’t generally valued much today, so very nice frames go for cheap on Craigslist, Ebay and elsewhere. The top bikes from big manufacturers can still fetch a hefty price, Schwinn Paramounts for instance, but drop a few rungs down the catalog and you can find bikes like my Motobecane Grand Jubile for $100 online or prolly less at yardsales and the like.
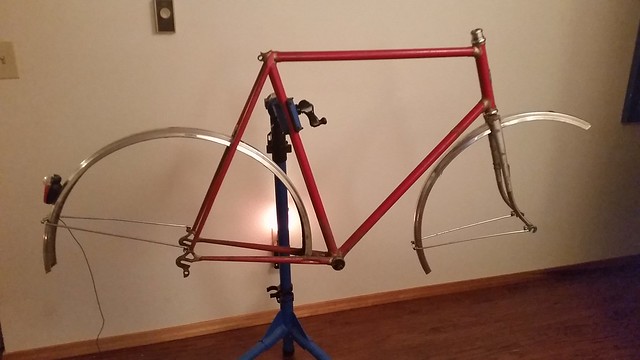
Frame clearances
- So yea, start with a good frame. Next, clearances. Bikeman goes into this extensively. I can’t add much. If at all possible, have a 650b wheelset with the tires you’d like to use with you when you look at bikes. If clearances are real tight at the chainstays, check the chainstays’ shape. Are they already heavily dimpled? If not, you might be able to make some room with channel locks and a nut. Also, 38mm tires rule. 42mm tires are cool too, but if they’re just too close for comfort, my absolute favorite tire these days is the 38mm Pacenti Pari-Moto. Going from 42mm to 38mm is, in my mind, a very minimal compromise if the rest of the bike is looking ideal for 650b. As mentioned by bikeman, check the BB drop. Pedal strike can be scary.
French bikes are awesome and weird
- Some things to consider if you go old French (Peugeot, Motobecane, Gitane, others). You’ll have a French thread headset. Not too much trouble, Velo Orange sells them if you’re in need and old ones are out there. If you want a modern 8-10 speed drivetrain, the rear dropout will need to be widened from 126mm to 130mm which isn’t much trouble. This goes for non-French bikes of the era as well. Stems and bottom brackets can be the real trouble with old and French. French stems were 22.0, as opposed to just about everyone else, who used 22.2 stems. This 1/5th of a millimeter can BITE YOU! Or not. Before de-Frenching my Motobecane (maybe a later blog post on that), I used 22.2 stems. Some would work, some wouldn’t. A little (or more) sanding should work to make a 22.2 stem fit. And 22.0 stems can be found.
- Bottom brackets can be trickier. Many old Frenchies have French thread bottom brackets. These, again, are still made by VO and others. However, Motobecanes and perhaps others had Swiss thread BBs. These may still be made by Phil Wood for a not cheap price but have otherwise gone the way of the dodo. Check with the LBS (local bike shop if you’re not hip) to see if they can re-tap your BB shell to take an English thread (standard today) bottom bracket.
- As always, Grandpa Brown has LOADS of helpful things to say about Frenchies. And if you find a complete French bike in good shape, you may well not need to worry about stems or BBs or headsets or anything for a good long time.
Brakes!
- If you want to go 650b, one thing that absolutely needs to be replaced are the brakes*. This too is well covered by Bikeman iirc (if I recall correctly), but the main options are the Tektro 559 and Dia Compe 750. If you’re going from 27″ to 650b, go Dia Compe. They have 5mm more reach and still you may have to remove some metal from the rear pad adjustment slot – Dremel or similar helps. I used a round file – works but takes longer. Both these options have long brake arms which can flex and make braking underwhelming. Pads can make a huge difference. The Tektro 559 will take a Kool Stop Dura-2 replacement insert, which has done wonders for any brake I’ve plugged them into. New Dia Compe 750s look like they come with a pad holder that takes a typical Shimano style pad that can be replaced with a Kool Stop like the Tektro can, but if you find some cheap old 750s (shops with lots of old parts will often have used 750s for $5-$10) that have old or no pads, something like this with Kool Stops will help.
- Other brake options include Tektro 800a (LOTS of reach for cheao) and MAFAC Raids (LOTS of reach for not cheap and rare – but MAFAC!)
* Unless you’ve converting a disk brake bike – not a thing on old bikes. Otherwise, at least VERY likely you’d need to swap brakes.

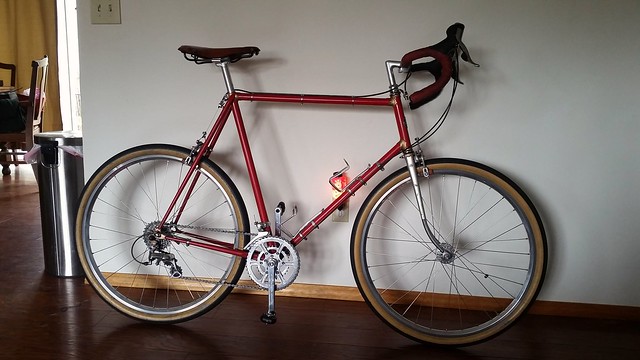
All this can hopefully help you towards building a slick little bike. This is pretty basic stuff thus far tho. New wheels, new brakes, nothing too tough. I’ll go further in depth with later posts.

For brakes, another option is a vintage set of MAFAC RAIDs. The reach is MASSIVE, even more than the DC 750’s. Some think they’re rarer than hens teeth, I see them pop up on eBay France a few times a month. Since Compass came out with what is essentially an updated version of the RAID brake, going rate is around $65-$75 a set.
Some of the easier to find MAFAC brakes have decent reach for fatter tires, such as the Competition, or better yet, the 2000. Here’s a pretty good chart comparing all the pertinent dimensions for all of the brakes discussed here and in the main article: http://ruedatropical.com/2009/01/mafac-dia-compe-paul-centerpull-brake-specs/
Of course, another option is to add braze-ons for cantilevers (or centerpulls, for that matter). Unless you know somebody (or can braze yourself), this may be beyond your budget.
LikeLike